hexo个性化设置
补一补之前忘记写的内容…
hexo主题配置
Themes of Hexo官网提供许多主题模板,可以依照喜好选择,本篇以Next为例
进入hexo项目文件夹,输入命令
1
git clone https://github.com/next-theme/hexo-theme-next themes/next
打开站点配置文件(路径:根目录/_config.yml),添加基本配置并修改主题为Next
1
theme: next
菜单设置
默认的菜单只有首页和归档两个,可以添加菜单,打开主题配置文件(路径:根目录/themes/next/_config.yml),修改内容,根据需要删除前面注释即可启用
1
2
3
4
5
6
7
8
9
menu:
home: / || home //首页
archives: /archives/ || archive //归档
categories: /categories/ || th //分类
tags: /tags/ || tags //标签
about: /about/ || user //关于
schedule: /schedule/ || calendar //日程表
sitemap: /sitemap.xml || sitemap //站点地图
commonweal: /404/ || heartbeat //404将菜单设置的注释去掉后,需进行创建,以categories和tags为例,删除menu对应注释后,输入命令
1
hexo new page categories(tags等)
把文章归入分类只需在文章的顶部标题下方添加
categories字段,即可自动创建分类名并加入对应的分类中把文章添加标签只需在文章的顶部标题下方添加
tags字段,即可自动创建标签名并归入对应的标签中
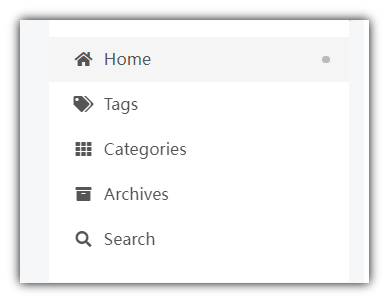
主题样式设置
Next主题有多种选择,根据需要删除前面注释即可启用,同样是在/themes/next/_config.yml中配置
1
2
3
4
5Schemes
scheme: Muse
scheme: Mist
scheme: Pisces
scheme: Gemini
侧边栏设置
打开主题配置文件找到
sidebar字段1
2
3
4
5
6
7
8
9
10
11
12
13
14
15
16sidebar:
Sidebar Position - 侧栏位置(只对Pisces | Gemini两种风格有效)
position: left //靠左放置
position: right //靠右放置
Sidebar Display - 侧栏显示时机(只对Muse | Mist两种风格有效)
display: post //默认行为,在文章页面(拥有目录列表)时显示
display: always //在所有页面中都显示
display: hide //在所有页面中都隐藏(可以手动展开)
display: remove //完全移除
offset: 12 //文章间距(只对Pisces | Gemini两种风格有效)
b2t: false //返回顶部按钮(只对Pisces | Gemini两种风格有效)
scrollpercent: true //返回顶部按钮的百分比
搜索设置
需要安装插件,输入命令
1
npm install hexo-generator-searchdb --save
打开站点配置文件,根目录/_config.yml找到
Extensions在下面添加1
2
3
4
5
6搜索
search:
path: search.xml
field: post
format: html
limit: 10000打开主题配置文件找到
Local search,将enable设置为true1
2local_search:
enable: true
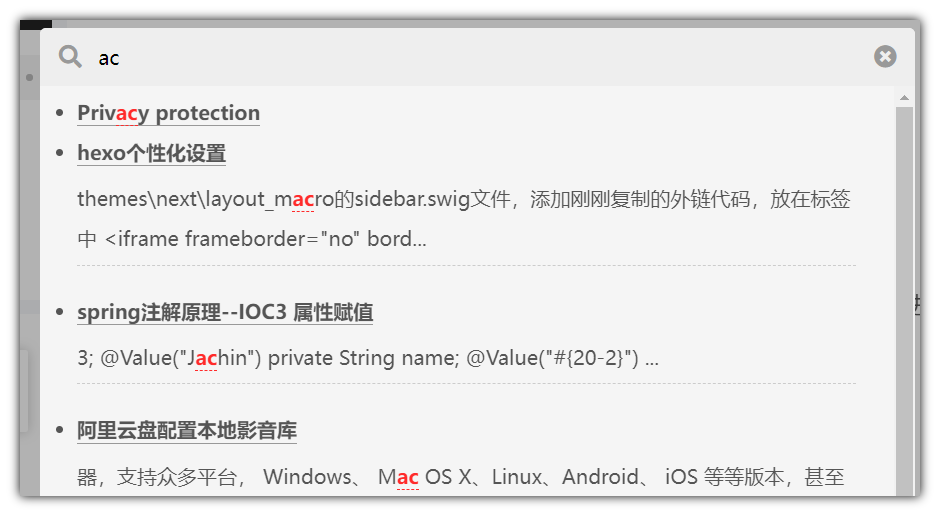
添加阅读全文按钮
首页文章显示部分,可以通过再文章中添加<!--more -->显示部分,并添加阅读全文按钮
本地测试
输入命令
1
2
3hexo c
hexo g
hexo s然后就可以在localhost:4000进行本地查看了
hexo+Typora显示图片问题
本地设置
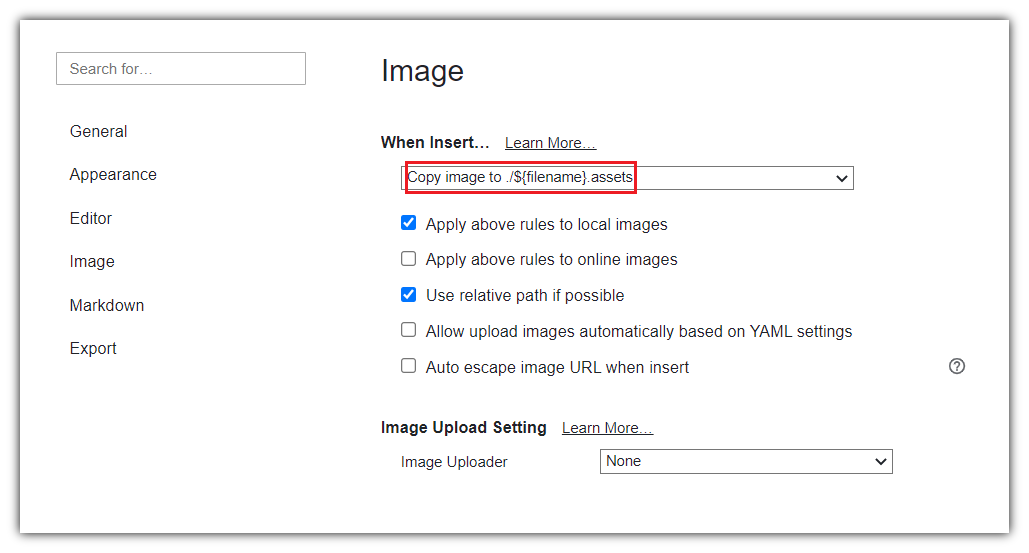
利用Typora编写Markdown文件,构建页面后访问网站存在图片不显示的问题,可通过以下方法解决此问题
打开站点配置文件修改
post_asset_folder为true打开Typora,点击文件—偏好设置—图像,修改为如下设置
打开Powershell,输入命令
1
npm install hexo-asset-image-for-hexo5 --save
Github做图床
具体做法如下:
- 图片保存在github仓库,是有1个G的容量限制的,不过可以创建多个仓库对吧
这里是jsDelivr的地址现在写这篇文章的时候也是可以用的。
到这里,就会发现另一个问题,就是在使用图片的时候需要先上传到GitHub仓库中,然后通过将图片地址变成jsDelivr加速后的地址,就像这样:
1 | https://raw.githubusercontent.com/你的用户名/你的仓库名/master/文件路径 |
这个过程其实是很麻烦的…当然是不能容忍,于是就在网上去找一些简便操作,发现倒是有很多人写过关于粘贴图片时候返回加速后的链接的内容,不过很多都是七牛云等等…不过还是找到了一个可以在粘贴图片的时候将图片上传到GitHub同时返回jsDelivr的链接地址
当然这个也是需要去安装一个软件AutoHotkey,这个可以去运行一些windows脚本语言,可以去绑定快捷键完成操作等等…下面就是它的脚本:
1 | ;上传图片github,剪切板markdown |
配置之后就可以不用麻烦的去拼接地址了!!!
添加音乐
网易云外链
在网易云音乐中打开你想要插入的音乐页面,点击 生成外联播放器。
在网页中调整好播放器插件后,复制下方的HTML代码。以侧边栏为例,修改blog\themes\next\layout\_macro的sidebar.swig文件,添加刚刚复制的外链代码,放在<aside class=”sidebar”>标签中
1
<iframe frameborder="no" border="0" marginwidth="0" marginheight="0" width=330 height=86 src="//music.163.com/outchain/player?type=2&id=28946040&auto=1&height=66"></iframe>
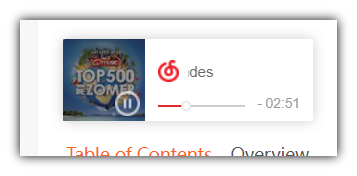
这种网易云音乐外链的方式有很多局限性,因此推荐使用aplayer
使用aplayer
Aplayer是一个开源的,网页端的播放器,这是它的使用文档,这个播放器可以支持播放本地自定义的音频、歌词、专辑封面等等,但是由于我是想直接使用网络端的歌单,所以直接跳过了这一步,本地使用方法可以直接参考使用文档,写的很详细。
接下来的重头戏是直接使用meting实现网络歌单,我是想在所有页面的固定位置显示这个播放模块,正好aplayer自带的吸底模式(翻译为fixed,有点难理解)符合我的要求,它会始终出现在网页的左下角,配合pjax实现不刷新内容,大赞!
添加依赖
找到主题的页面布局文件,
\themes\next\layout\ _layout.swig
首先在body中添加依赖:1
2
3<link rel="stylesheet" href="https://cdn.jsdelivr.net/npm/aplayer@1.10.1/dist/APlayer.min.css"><!--APlayer的样式-->
<script src="https://cdn.jsdelivr.net/npm/aplayer@1.10.1/dist/APlayer.min.js"></script><!--APlayer的依赖-->
<script src="https://cdn.jsdelivr.net/npm/meting@2/dist/Meting.min.js"></script><!--Meting的依赖-->这里我们指定了版本,因为meting的新版本和aplayer有奇怪的兼容性问题…
然后就是使用metingjs了,首先附一个官方的使用文档,使用方法也非常的简单:在D:\Blogs\blog\themes\next\layout\_macro\sidebar.swig文件中配置1
2
3
4
5
6
7<meting-js
server="netease"
type="playlist"
autoplay=f
fixed=true
id="7267391672">
</meting-js>- server: 歌单的服务商,比如netease代表网易云,tencent代表qq音乐等等
- type: 类型,单曲或歌单
- autoplay: 打开网页自动播放
- fixed: 使用吸底模式
- id: 歌单的id,在网页端可以直接查看
保存,重启服务之后发现已经出现了吸底的浮窗
pjax的配置
配置完aplayer,接下来就是配置跨页面不刷新了。由于我使用的是next主题,其实next主题已经想到了可能是用的pjax,所以我们只需要安装依赖,并且在config中启用即可。
首先安装依赖
1
2cd themes/next
git clone https://github.com/theme-next/theme-next-pjax source/lib/pjax然后我们只需要在next的_config.yml中找到pjax选项,将false改为true即可

自定义歌词颜色
上面可以发现,在\themes\next\layout\ _layout.swig中APlayer.min.css文件是从远程引用的,我们需要下载到这个文件进行修改
找到.aplayer .aplayer-lrc p.aplayer-lrc-current
1 | .aplayer .aplayer-lrc p.aplayer-lrc-current { |
修改如下
1 | .aplayer .aplayer-lrc p.aplayer-lrc-current { |
最后替换一下链接就可以了。

添加动态背景
修改\themes\next\layout\_layout.swig
在 < /body>之前添加代码(注意不要放在< /head>的后面)
1 | {% if theme.canvas_nest %} |
修改配置文件
打开 /themes/next/_config.yml,在里面添加如下代码:(可以放在最后面)
1 | # -------------------------------------------------------------- |
如果想要自定义线条的话,设置如下:
在上一步修改 _layout.swig中,把刚才的这些代码:
1 | {% if theme.canvas_nest %} |
改为
1 | {% if theme.canvas_nest %} |
配置项说明
color:线条颜色, 默认:'0,0,0';三个数字分别为(R,G,B)opacity: 线条透明度(0~1), 默认:0.5count: 线条的总数量, 默认:150zIndex:背景的z-index属性,css属性用于控制所在层的位置, 默认:-1
添加背景图片
设置背景图片
将想要的背景图片放入 themes/next/source/images。打开 \blog\source\_data\styles.styl 文件,添加以下代码即可:
1 | body { |
background:url 为图片路径,也可以直接使用链接。
background-repeat:若果背景图片不能全屏,那么是否平铺显示,充满屏幕
background-attachment:背景是否随着网页上下滚动而滚动,fixed 为固定
background-size:图片展示大小,这里设置 100%,100% 的意义为:如果背景图片不能全屏,那么是否通过拉伸的方式将背景强制拉伸至全屏显示。
博客内容透明化
NexT 主题的博客文章均是不透明的,这样读者就不能好好欣赏背景图片了,下面的方法可以使博客内容透明化:
在 themes/next/source/css/_custom/custom.styl 中添加以下内容:
1 | //博客内容透明化 |
注意:其中 header-inner 不能使用 opacity 进行配置。因为 header-inner 包含 header.swig 中的所有内容。若使用 opacity 进行配置,子结点会出很多问题。
无_custom/custom.styl 文件时,在根目录source下创建 _data文件夹创建styles.styl文件加入css代码,主题_config.yml 文件修改:
1 | custom_file_path: |
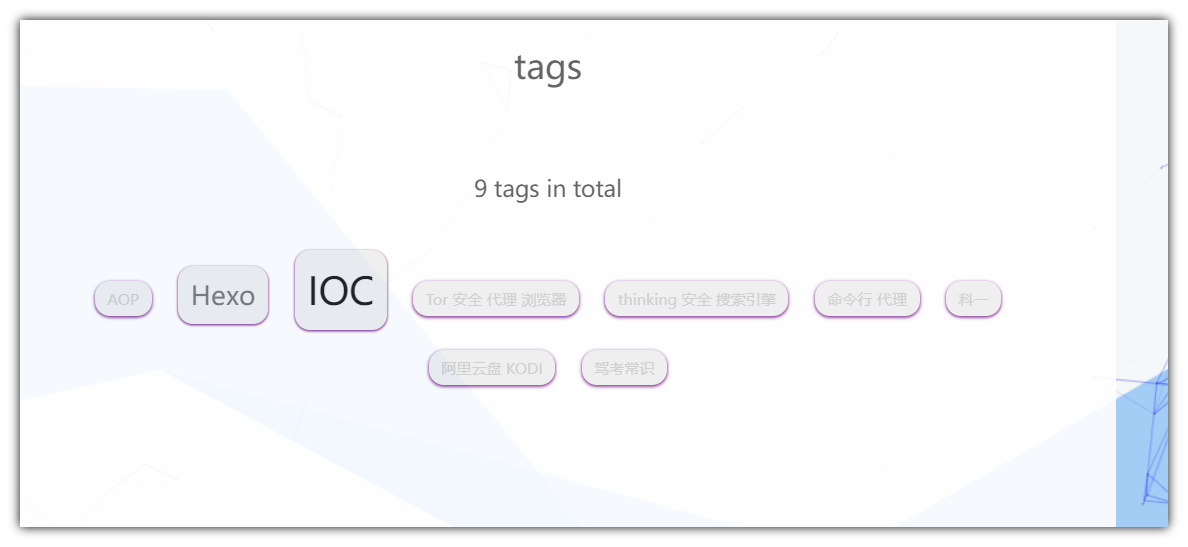
修改博客字体颜色
在根目录source下的 _data文件夹下的tyles.styl文件加入css代码
1 | //修改字体颜色 |
修改标题栏背景图片
在根目录source下的 _data文件夹下的tyles.styl文件加入css代码
1 | //标题栏 |
修改文章底部的那个带#号的标签
具体实现方法
修改模板/themes/next/layout/_macro/post.swig,搜索 rel=”tag”>,将 # 换成
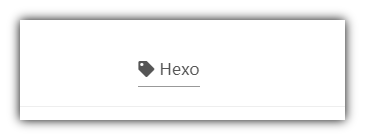
修改分类层级显示
修改 post.njk
打开 \blog\themes\next\layout\_macro\post.swig
查找
1 | {{ __('symbol.comma') }} |
改为
在每篇文章末尾统一添加“本文结束”标记
在路径 \themes\next\layout\_macro 中新建 passage-end-tag.swig 文件,并添加以下内容:
这里的图标名称来自于FontAwesome icon。
1 | <div> |
接着打开\themes\next\layout\_macro\post.swig文件,在post-body 之后, post-footer之前添加
1 | {% include 'passage-end-tag.swig' %} |
然后打开主题配置文件(_config.yml),在末尾添加:
1 | # 文章末尾添加“本文结束”标记 |
设置网站图标
默认的网站图标是一个N,当然是需要制定一个图了,在网上找到图后,将其放在/themes/next/source/images里面,然后在主题配置文件中修改下图所示图片位置
1 | favicon: |
hexo添加tag cloud
首先执行命令:
1 | npm install hexo-tag-cloud |
然后需要你去修改主题的 tagcloud 的模板
sidebar中添加:
找到文件
next/layout/_macro/sidebar.swig, 然后添加如下内容。1
2
3
4
5
6
7
8
9
10
11
12
13
14{% if site.tags.length > 1 %}
<script type="text/javascript" charset="utf-8" src="{{ url_for('/js/tagcloud.js') }}"></script>
<script type="text/javascript" charset="utf-8" src="{{ url_for('/js/tagcanvas.js') }}"></script>
<div class="widget-wrap">
<h3 class="widget-title">Tag Cloud</h3>
<div id="myCanvasContainer" class="widget tagcloud">
<canvas width="250" height="250" id="resCanvas" style="width:100%">
{{ list_tags() }}
</canvas>
</div>
</div>
{% endif %}
{%- if theme.back2top.enable and theme.back2top.sidebar %}...tag页添加:
在themes/next/layout/page.swig中添加代码效果如下:
1
2
3
4
5
6
7
8
9
10
11
12{% if site.tags.length > 1 %}
<script type="text/javascript" charset="utf-8" src="/js/tagcloud.js"></script>
<script type="text/javascript" charset="utf-8" src="/js/tagcanvas.js"></script>
<div class="widget-wrap">
<div id="myCanvasContainer" class="widget tagcloud" style="margin-left: 33%;">
<canvas width="400" height="400" id="resCanvas" style="width=100%">
{{ list_tags() }}
</canvas>
</div>
</div>
{% endif %}
{% elif page.type === 'categories' %}...效果:

自定义
在博客的根目录,找到_config.yml文件,最后添加如下的配置项:
1 | # hexo-tag-cloud |
textColor: ‘#00f’ 字体颜色
textHeight: 25 字体高度,根据部署的效果调整
maxSpeed: 0.5 文字滚动速度,根据自己喜好调整
添加live2d模型
命令行输入
npm install --save hexo-helper-live2d获取插件。、输入
npm install [name]即可下载相应的模型,将[name]更换成模型名称即可,更多模型选择点击获取,各个模型的预览请访问这里。打开站点目录下的
_config.yml文件,添加如下代码:1
2
3
4
5
6
7
8
9
10
11
12
13
14
15
16
17
18
19
20
21
22
23
24
25
26live2d:
enable: true
scriptFrom: local
pluginRootPath: live2dw/ # 插件在站点上的根目录(相对路径)
pluginJsPath: lib/ # 脚本文件相对与插件根目录路径
pluginModelPath: assets/ # 模型文件相对与插件根目录路径
tagMode: false # 标签模式, 是否仅替换 live2dtag标签而非插入到所有页面中
debug: false
model:
use: live2d-widget-model-hijiki # 模型名字
scale: 1
hHeadPos: 0.5
vHeadPos: 0.618
display:
superSample: 2
width: 150 # 显示位置及大小 我设置的250*500
height: 300
position: right
hOffset: 0
vOffset: -20
mobile:
show: false # 手机显示开关,建议关闭
scale: 0.5
react:
opacityDefault: 0.7 # 模型透明度
opacityOnHover: 0.2我们在
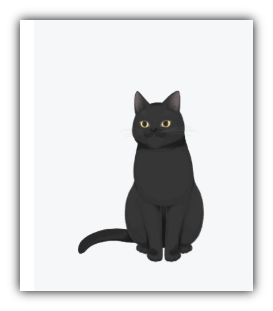
node_modules目录下面找到live2d-widget-model-hijiki这个文件夹,把这个文件夹复制下来 找到我们的hexo博客的根目录(因为我们是在根目录的_config.yml里添加的配置)新建一个文件夹叫做live2d_models,把刚刚我们复制的文件粘贴过来在配置文件中把
use后面改成我们复制在live2d_models文件夹里面的模型目录名称,这样我们就完成了修改
添加鼠标点击效果
爱心效果
在
themes/你选择的主题/source/js下新建文件heart.js,添加:1
2
3
4
5
6
7
8
9
10
11
12
13
14
15
16
17
18
19
20
21
22
23
24
25
26
27
28
29
30
31
32
33
34
35
36
37
38
39
40
41
42
43
44
45
46
47
48
49
50
51
52
53
54
55
56
57
58
59
60
61
62
63
64
65
66
67
68
69
70
71
72
73
74
75
76
77
78
79
80
81
82
83
84
85
86!(function (e, t, a) {
function n() {
c(
".heart{width: 10px;height: 10px;position: fixed;background: #f00;transform: rotate(45deg);-webkit-transform: rotate(45deg);-moz-transform: rotate(45deg);}.heart:after,.heart:before{content: '';width: inherit;height: inherit;background: inherit;border-radius: 50%;-webkit-border-radius: 500%;-moz-border-radius: 50%;position: fixed;}.heart:after{top: -5px;}.heart:before{left: -5px;}"
),
o(),
r();
}
function r() {
for (var e = 0; e < d.length; e++)
d[e].alpha <= 0
? (t.body.removeChild(d[e].el), d.splice(e, 1))
: (d[e].y--,
(d[e].scale += 0.004),
(d[e].alpha -= 0.013),
(d[e].el.style.cssText =
"left:" +
d[e].x +
"px;top:" +
d[e].y +
"px;opacity:" +
d[e].alpha +
";transform:scale(" +
d[e].scale +
"," +
d[e].scale +
") rotate(45deg);background:" +
d[e].color +
";z-index:99999"));
requestAnimationFrame(r);
}
function o() {
var t = "function" == typeof e.onclick && e.onclick;
e.onclick = function (e) {
t && t(), i(e);
};
}
function i(e) {
var a = t.createElement("div");
(a.className = "heart"),
d.push({
el: a,
x: e.clientX - 5,
y: e.clientY - 5,
scale: 1,
alpha: 1,
color: s(),
}),
t.body.appendChild(a);
}
function c(e) {
var a = t.createElement("style");
a.type = "text/css";
try {
a.appendChild(t.createTextNode(e));
} catch (t) {
a.styleSheet.cssText = e;
}
t.getElementsByTagName("head")[0].appendChild(a);
}
function s() {
return (
"rgb(" +
~~(255 * Math.random()) +
"," +
~~(255 * Math.random()) +
"," +
~~(255 * Math.random()) +
")"
);
}
var d = [];
(e.requestAnimationFrame = (function () {
return (
e.requestAnimationFrame ||
e.webkitRequestAnimationFrame ||
e.mozRequestAnimationFrame ||
e.oRequestAnimationFrame ||
e.msRequestAnimationFrame ||
function (e) {
setTimeout(e, 1e3 / 60);
}
);
})()),
n();
})(window, document);themes/你选择的主题/layout/_layout.swig下添加:1
2<!-- 页面点击小红心 -->
<script type="text/javascript" src="/js/heart.js"></script>
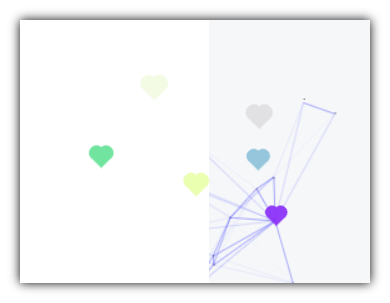
烟花爆炸效果
在
themes/你选择的主题/source/js下新建文件firework.js,添加:1
2
3
4
5
6
7
8
9
10
11
12
13
14
15
16
17
18
19
20
21
22
23
24
25
26
27
28
29
30
31
32
33
34
35
36
37
38
39
40
41
42
43
44
45
46
47
48
49
50
51
52
53
54
55
56
57
58
59
60
61
62
63
64
65
66
67
68
69
70
71
72
73
74
75
76
77
78
79
80
81
82
83
84
85
86
87
88
89
90
91
92
93
94
95
96
97
98
99
100
101
102
103
104
105
106
107
108
109
110
111
112
113
114
115
116
117
118
119
120
121
122
123
124
125
126
127
128
129
130
131
132
133
134
135
136
137
138
139
140
141
142
143
144
145
146
147
148
149
150
151
152
153
154
155
156
157
158
159
160
161
162
163
164
165
166
167
168
169
170
171
172
173
174
175
176
177
178
179
180
181
182
183
184
185
186
187
188
189
190
191
192
193
194
195
196
197
198
199
200
201
202
203
204
205
206
207
208
209
210
211
212
213
214
215
216
217
218
219
220
221
222
223
224
225
226
227
228
229
230
231
232
233
234
235
236
237
238
239
240
241
242
243
244
245
246
247
248
249
250
251
252
253
254
255
256
257
258
259
260
261
262
263
264
265
266;
function updateCoords(e) {
(pointerX =
(e.clientX || e.touches[0].clientX) -
canvasEl.getBoundingClientRect().left),
(pointerY =
e.clientY || e.touches[0].clientY - canvasEl.getBoundingClientRect().top);
}
function setParticuleDirection(e) {
var t = (anime.random(0, 360) * Math.PI) / 180,
a = anime.random(50, 180),
n = [-1, 1][anime.random(0, 1)] * a;
return { x: e.x + n * Math.cos(t), y: e.y + n * Math.sin(t) };
}
function createParticule(e, t) {
var a = {};
return (
(a.x = e),
(a.y = t),
(a.color = colors[anime.random(0, colors.length - 1)]),
(a.radius = anime.random(16, 32)),
(a.endPos = setParticuleDirection(a)),
(a.draw = function () {
ctx.beginPath(),
ctx.arc(a.x, a.y, a.radius, 0, 2 * Math.PI, !0),
(ctx.fillStyle = a.color),
ctx.fill();
}),
a
);
}
function createCircle(e, t) {
var a = {};
return (
(a.x = e),
(a.y = t),
(a.color = "#F00"),
(a.radius = 0.1),
(a.alpha = 0.5),
(a.lineWidth = 6),
(a.draw = function () {
(ctx.globalAlpha = a.alpha),
ctx.beginPath(),
ctx.arc(a.x, a.y, a.radius, 0, 2 * Math.PI, !0),
(ctx.lineWidth = a.lineWidth),
(ctx.strokeStyle = a.color),
ctx.stroke(),
(ctx.globalAlpha = 1);
}),
a
);
}
function renderParticule(e) {
for (var t = 0; t < e.animatables.length; t++) {
e.animatables[t].target.draw();
}
}
function animateParticules(e, t) {
for (var a = createCircle(e, t), n = [], i = 0; i < numberOfParticules; i++) {
n.push(createParticule(e, t));
}
anime
.timeline()
.add({
targets: n,
x: function (e) {
return e.endPos.x;
},
y: function (e) {
return e.endPos.y;
},
radius: 0.1,
duration: anime.random(1200, 1800),
easing: "easeOutExpo",
update: renderParticule,
})
.add({
targets: a,
radius: anime.random(80, 160),
lineWidth: 0,
alpha: { value: 0, easing: "linear", duration: anime.random(600, 800) },
duration: anime.random(1200, 1800),
easing: "easeOutExpo",
update: renderParticule,
offset: 0,
});
}
function debounce(e, t) {
var a;
return function () {
var n = this,
i = arguments;
clearTimeout(a),
(a = setTimeout(function () {
e.apply(n, i);
}, t));
};
}
var canvasEl = document.querySelector(".fireworks");
if (canvasEl) {
var ctx = canvasEl.getContext("2d"),
numberOfParticules = 30,
pointerX = 0,
pointerY = 0,
tap = "mousedown",
colors = ["#FF1461", "#18FF92", "#5A87FF", "#FBF38C"],
setCanvasSize = debounce(function () {
(canvasEl.width = 2 * window.innerWidth),
(canvasEl.height = 2 * window.innerHeight),
(canvasEl.style.width = window.innerWidth + "px"),
(canvasEl.style.height = window.innerHeight + "px"),
canvasEl.getContext("2d").scale(2, 2);
}, 500),
render = anime({
duration: 1 / 0,
update: function () {
ctx.clearRect(0, 0, canvasEl.width, canvasEl.height);
},
});
document.addEventListener(
tap,
function (e) {
"sidebar" !== e.target.id &&
"toggle-sidebar" !== e.target.id &&
"A" !== e.target.nodeName &&
"IMG" !== e.target.nodeName &&
(render.play(), updateCoords(e), animateParticules(pointerX, pointerY));
},
!1
),
setCanvasSize(),
window.addEventListener("resize", setCanvasSize, !1);
}
("use strict");
function updateCoords(e) {
(pointerX =
(e.clientX || e.touches[0].clientX) -
canvasEl.getBoundingClientRect().left),
(pointerY =
e.clientY || e.touches[0].clientY - canvasEl.getBoundingClientRect().top);
}
function setParticuleDirection(e) {
var t = (anime.random(0, 360) * Math.PI) / 180,
a = anime.random(50, 180),
n = [-1, 1][anime.random(0, 1)] * a;
return { x: e.x + n * Math.cos(t), y: e.y + n * Math.sin(t) };
}
function createParticule(e, t) {
var a = {};
return (
(a.x = e),
(a.y = t),
(a.color = colors[anime.random(0, colors.length - 1)]),
(a.radius = anime.random(16, 32)),
(a.endPos = setParticuleDirection(a)),
(a.draw = function () {
ctx.beginPath(),
ctx.arc(a.x, a.y, a.radius, 0, 2 * Math.PI, !0),
(ctx.fillStyle = a.color),
ctx.fill();
}),
a
);
}
function createCircle(e, t) {
var a = {};
return (
(a.x = e),
(a.y = t),
(a.color = "#F00"),
(a.radius = 0.1),
(a.alpha = 0.5),
(a.lineWidth = 6),
(a.draw = function () {
(ctx.globalAlpha = a.alpha),
ctx.beginPath(),
ctx.arc(a.x, a.y, a.radius, 0, 2 * Math.PI, !0),
(ctx.lineWidth = a.lineWidth),
(ctx.strokeStyle = a.color),
ctx.stroke(),
(ctx.globalAlpha = 1);
}),
a
);
}
function renderParticule(e) {
for (var t = 0; t < e.animatables.length; t++) {
e.animatables[t].target.draw();
}
}
function animateParticules(e, t) {
for (var a = createCircle(e, t), n = [], i = 0; i < numberOfParticules; i++) {
n.push(createParticule(e, t));
}
anime
.timeline()
.add({
targets: n,
x: function (e) {
return e.endPos.x;
},
y: function (e) {
return e.endPos.y;
},
radius: 0.1,
duration: anime.random(1200, 1800),
easing: "easeOutExpo",
update: renderParticule,
})
.add({
targets: a,
radius: anime.random(80, 160),
lineWidth: 0,
alpha: { value: 0, easing: "linear", duration: anime.random(600, 800) },
duration: anime.random(1200, 1800),
easing: "easeOutExpo",
update: renderParticule,
offset: 0,
});
}
function debounce(e, t) {
var a;
return function () {
var n = this,
i = arguments;
clearTimeout(a),
(a = setTimeout(function () {
e.apply(n, i);
}, t));
};
}
var canvasEl = document.querySelector(".fireworks");
if (canvasEl) {
var ctx = canvasEl.getContext("2d"),
numberOfParticules = 30,
pointerX = 0,
pointerY = 0,
tap = "mousedown",
colors = ["#FF1461", "#18FF92", "#5A87FF", "#FBF38C"],
setCanvasSize = debounce(function () {
(canvasEl.width = 2 * window.innerWidth),
(canvasEl.height = 2 * window.innerHeight),
(canvasEl.style.width = window.innerWidth + "px"),
(canvasEl.style.height = window.innerHeight + "px"),
canvasEl.getContext("2d").scale(2, 2);
}, 500),
render = anime({
duration: 1 / 0,
update: function () {
ctx.clearRect(0, 0, canvasEl.width, canvasEl.height);
},
});
document.addEventListener(
tap,
function (e) {
"sidebar" !== e.target.id &&
"toggle-sidebar" !== e.target.id &&
"A" !== e.target.nodeName &&
"IMG" !== e.target.nodeName &&
(render.play(), updateCoords(e), animateParticules(pointerX, pointerY));
},
!1
),
setCanvasSize(),
window.addEventListener("resize", setCanvasSize, !1);
}在
themes/你选择的主题/layout/_layout.swig下添加:1
2
3<canvas class="fireworks" style="position: fixed;left: 0;top: 0;z-index: 1; pointer-events: none;" ></canvas>
<script type="text/javascript" src="//cdn.bootcss.com/animejs/2.2.0/anime.min.js"></script>
<script type="text/javascript" src="/js/firework.js"></script>
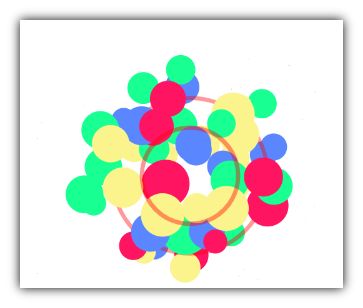
添加网站运行时间
记录网站运行时间在页脚显示,所以在
themes/你选择的主题/layout/_partial/footer.swig下添加:1
2
3
4
5
6
7
8
9
10
11
12
13
14
15
16
17
18
19
20
21
22
23
24
25
26
27
28
29
30
31
32
33
34
35
36
37
38
39
40<!--添加运行时间-->
<span id="sitetime"></span>
<script language=javascript>
function siteTime(){
window.setTimeout("siteTime()", 1000);
var seconds = 1000;
var minutes = seconds * 60;
var hours = minutes * 60;
var days = hours * 24;
var years = days * 365;
var today = new Date();
var todayYear = today.getFullYear();
var todayMonth = today.getMonth()+1;
var todayDate = today.getDate();
var todayHour = today.getHours();
var todayMinute = today.getMinutes();
var todaySecond = today.getSeconds();
/*
Date.UTC() -- 返回date对象距世界标准时间(UTC)1970年1月1日午夜之间的毫秒数(时间戳)
year - 作为date对象的年份,为4位年份值
month - 0-11之间的整数,做为date对象的月份
day - 1-31之间的整数,做为date对象的天数
hours - 0(午夜24点)-23之间的整数,做为date对象的小时数
minutes - 0-59之间的整数,做为date对象的分钟数
seconds - 0-59之间的整数,做为date对象的秒数
microseconds - 0-999之间的整数,做为date对象的毫秒数
*/
var t1 = Date.UTC(2022,01,10,20,00,00); //北京时间2018-2-13 00:00:00
var t2 = Date.UTC(todayYear,todayMonth,todayDate,todayHour,todayMinute,todaySecond);
var diff = t2-t1;
var diffYears = Math.floor(diff/years);
var diffDays = Math.floor((diff/days)-diffYears*365);
var diffHours = Math.floor((diff-(diffYears*365+diffDays)*days)/hours);
var diffMinutes = Math.floor((diff-(diffYears*365+diffDays)*days-diffHours*hours)/minutes);
var diffSeconds = Math.floor((diff-(diffYears*365+diffDays)*days-diffHours*hours-diffMinutes*minutes)/seconds);
document.getElementById("sitetime").innerHTML=" 本站已运行"+/*diffYears+" 年 "+*/diffDays+" 天 "+diffHours+" 小时 "+diffMinutes+" 分钟 "+diffSeconds+" 秒";
}
siteTime();
</script>
<!--// 添加运行时间-->

添加浏览器标题恶搞
在用户切换标签页的时候,更改浏览器标题呼唤用户回归,在
themes/你选择的主题/source/js下新建文件funny.js,添加:1
2
3
4
5
6
7
8
9
10
11
12
13
14
15
16var OriginTitle = document.title;
var titleTime;
document.addEventListener('visibilitychange', function () {
if (document.hidden) {
//$('[rel="icon"]').attr('href', "/funny.ico");
document.title = '╭(°A°`)╮ 页面崩溃啦 ~';
clearTimeout(titleTime);
}
else {
//$('[rel="icon"]').attr('href', "/favicon.ico");
document.title = '(ฅ>ω<*ฅ) 噫又好啦 ~' + OriginTitle;
titleTime = setTimeout(function () {
document.title = OriginTitle;
}, 2000);
}
});其中的
favicon.ico为正常显示图标,funny.ico为用户切换后的图标,需要你自己设置
博客代码备份
使用 hexo d 上传到 Github 的只是编译后的静态文件,博客的代码并没有上传到仓库里。
这样一旦你的博客代码丢失,你就无法继续更新了。
为了避免这种情况,我们要把博客代码也上传到仓库里,最好是上传到同一个仓库。
在本地文件根目录创建 .gitignore 文件,若存在修改为:
1 | .DS_Store |
在本地文件根目录中初始化 git
1 | git init |
创建分支develop
1 | git checkout -b develop |
提交到仓库,需要注意的事在提交之前要把themes目录下主题中的 .git 文件夹重命名或者删除,不然的话 git 会把主题当做子模块来处理。
1 | git add . |
添加远程仓库
1 | git remote add origin git@github.com:zsxfa/zsxfa.github.io.git |
push 到远程分支
1 | git push origin develop |
在别处使用
首先要克隆下这个项目
1 | git clone git@github.com:zsxfa/zsxfa.github.io.git |
进入博客目录
1 | cd zsxfa.github.io |
切换到博客文件分支
1 | git checkout -b develop origin/develop |
安装hexo
1 | npm install hexo --save |
然后编辑、查看
1 | hexo g //编译 |
提交 git,若在提交过程中出现 ERROR Deployer not found: git 可执行 npm install hexo-deployer-git --save 后重新提交。
1 | hexo d |
在写了新 markdown 文件后提交 git
1 | git add . |
到此,我们以后只要写完博客发布后记得 push 一下就能实现备份了。
添加彩色滚动变换字体
在你想要添加彩色滚动变换字体的地方写入以下代码即可,其中文字可自行更改:
在D:\Blogs\blog\themes\next\layout\_macro\sidebar.swig中
1 | <div id="binft"></div> |

修改超链接的颜色
打开\themes\next\source\css\_common\components\post文件夹下的post.styl,添加以下css样式:
1 | .post-body p a { |
其中选择.post-body 是为了不影响标题,选择 p 是为了不影响首页“阅读全文”的显示样式,颜色可以自己定义。
文章添加阴影效果
打开\themes\next\source\css\_common\components\post文件夹下的post.styl,添加以下css样式:
1 | // 主页文章添加阴影效果 |
在博客底部添加访问量
打开/themes/next/_config.yml,找到busuanzi,修改为以下参数:
1 | busuanzi_count: |
在themes\next\layout\_partial\footer.swig中添加如下代码
1 | <!-- 新增访客统计代码 --> |
pv的方式,单个用户连续点击n篇文章,记录n次访问量。
uv的方式,单个用户连续点击n篇文章,只记录1次访客数。
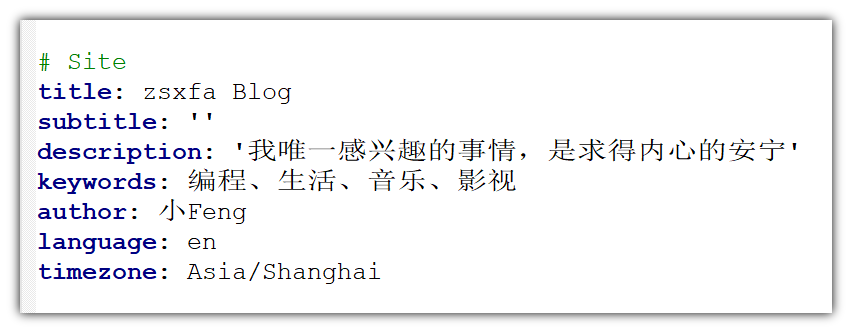
博客标题设置
这个相关的设置在blog/_config.yml中修改,如下图所示:
文章字数、阅读时长统计
打开博客根目录,运行以下命令,安装插件
复制
1 | npm install hexo-symbols-count-time --save |
然后修改博客配置文件,在末尾添加以下代码:
1 | symbols_count_time: |
最后在主题配置文件里面,找到symbols_count_time,修改成以下内容:
1 | symbols_count_time: |
阅读进度条
在主题配置文件中搜索reading_progress,找到如下代码段:
1 | # Reading progress bar |
将enable设为true来启用
博客背景动画效果canvas_ribbon
1 | git clone https://github.com/theme-next/theme-next-canvas-ribbon source/lib/canvas-ribbon |
在主题配置文件中, 搜索: canvas_nest, 修改为自定义值即可.
1 | canvas_nest: |
内容里的代码块新增复制按钮
主题配置文件中
1 | codeblock: |

文章原创申明
1 | creative_commons: |
添加标题底部横线
打开 \blog\source\_data\styles.styl
添加
1 | h1, h2, h3, h4, h5, h6 { |
记忆浏览位置
关闭本页,重新打开,将返回刚才的浏览进度。
打开 \hexo-theme-next\source\js\custom\custom.js
添加
1 | // 记忆浏览位置 |
添加Github丝带或者角标
打开themes/next/layout/_layout.swig文件,在
href改为你的博客地址

添加RSS订阅
首先在博客的根目录/blog,安装Hexo插件,插件会放在node_modules这个文件夹。
1 | npm install --save hexo-generator-feed |
接下来打开/blog/_config.yml文件,在末尾添加
复制
1 | # RSS订阅 |
然后打开/blog/themes/next/_config.yml文件,找到rss,添加参数
复制
1 | RSS: /atom.xml || fa fa-rss |
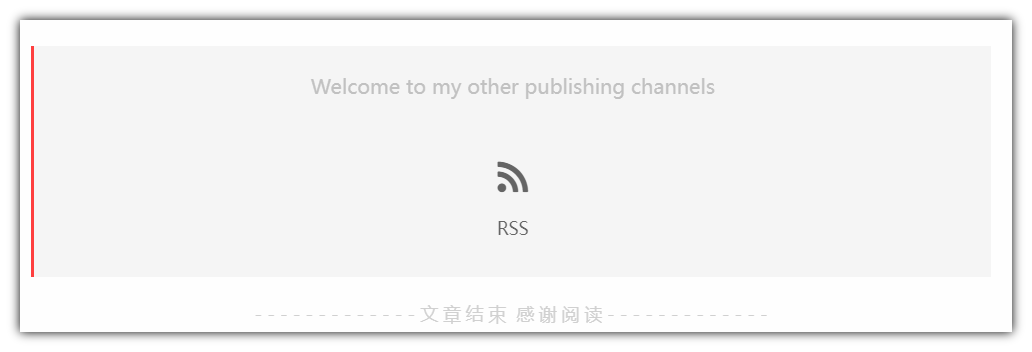
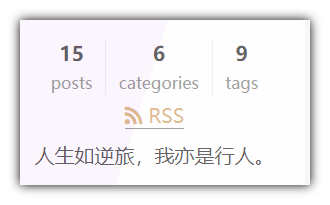
但是这个RSS链接是放在每篇文章的底部的,而我想要把 RSS 放在侧边栏里,这样会更加简洁明了一些,因此对 next 主题进行了一些小修改。
具体的修改思路为,先安装 hexo-generator-feed 插件用来生成 RSS feed 接口文件,然后把 RSS 链接部分的代码写进 next 主题的侧边栏模版,把代码需要引用的设置(比如说 RSS 显示的图标、颜色、文本等)写在 next 主题的配置文件 _config.yml 中。
由于上面已经安装过了,所以这里不再重复安装
安装好了之后可以在 hexo 博客配置文件
_config.yml中,添加该插件的配置,比如说使用 Atom 协议还是 RSS2.0 协议,最多在 feed 文件中生成多少条博客内容等:1
2
3
4
5# hexo/_config.yml
feed:
type: atom # 使用 Atom 协议
path: atom.xml # 生成的 feed 文件路径
limit: 20 # 最多生成20条博文打开 next 主题的配置文件
next/_config.yml,在Sidebar Settings部分的最后添加以下设置,以便在后面的模版文件中进行引用:1
2
3
4
5
6# next/_config.yml
sidebar_rss:
text: RSS
icon: fa fa-rss
color: burlywood
link: atom.xml其中,
text是RSS 在侧边栏显示的文本,icon即 RSS 的 Font Awesome 小图标,color即 RSS 的颜色(因为想要突出它所以设置为 CSS 的 burlywood 色,当然也可以不设置或者设置为其它颜色),link即前面 RSS feed 插件生成的链接,一般为atom.xml打开 sidebar 的模版文件
next/layout/_partials/sidebar/site-overview.swig,在适当的位置(建议为社交链接部分的上面,如果加在最后的话,则 RSS 便位于侧边栏的最底端)插入以下代码:1
2
3
4
5
6
7
8
9
10{%- if theme.sidebar_rss %}
<div class="">
<a target="_blank" class="social-link" href="{{ url_for(theme.sidebar_rss.link) }}" style="color: {{ theme.sidebar_rss.color }};">
<span class="icon">
<i class="{{ theme.sidebar_rss.icon }}"></i>
</span>
<span class="label">{{ theme.sidebar_rss.text }}</span>
</a>
</div>
{%- endif %}
侧边栏添加社交图标
打开主题配置文件_config.yml,搜索social:,在图标库找自己喜欢的小图标,并将名字复制在如下位置,保存即可
1 | social: |

阅读进度百分比
修改
主题配置文件,修改back2top:
2
3
4
5
6
enable: true # 开启 back to top 按钮
# Back to top in sidebar.
sidebar: true # true 表示在侧边栏显示,false则在侧下角
# Scroll percent label in b2t button.
scrollpercent: true # 开启进度百分比

放大图片
开启 fancybox开关即可:
1 | # FancyBox is a tool that offers a nice and elegant way to add zooming functionality for images. |
添加评论系统
Hexo的NexT主题本身就集成了一些评论系统,目前比较多人用的有畅言、来必力livere、Gitment、Gitalk、Disqus等。
网上搜索了一下发现畅言需要备案,Disqus需要FQ,Gitment和Gitalk类似,都需要GitHub账号。我这里使用的是来必力livere
来必力:https://livere.com(来自韩国,可以使用邮箱注册。)
来必力是一个可以用国内账号评论且不需实名的评论系统
获取livere uid
点击https://livere.com/页面 上方的安装,选择免费的city版本。填写真实的网站信息
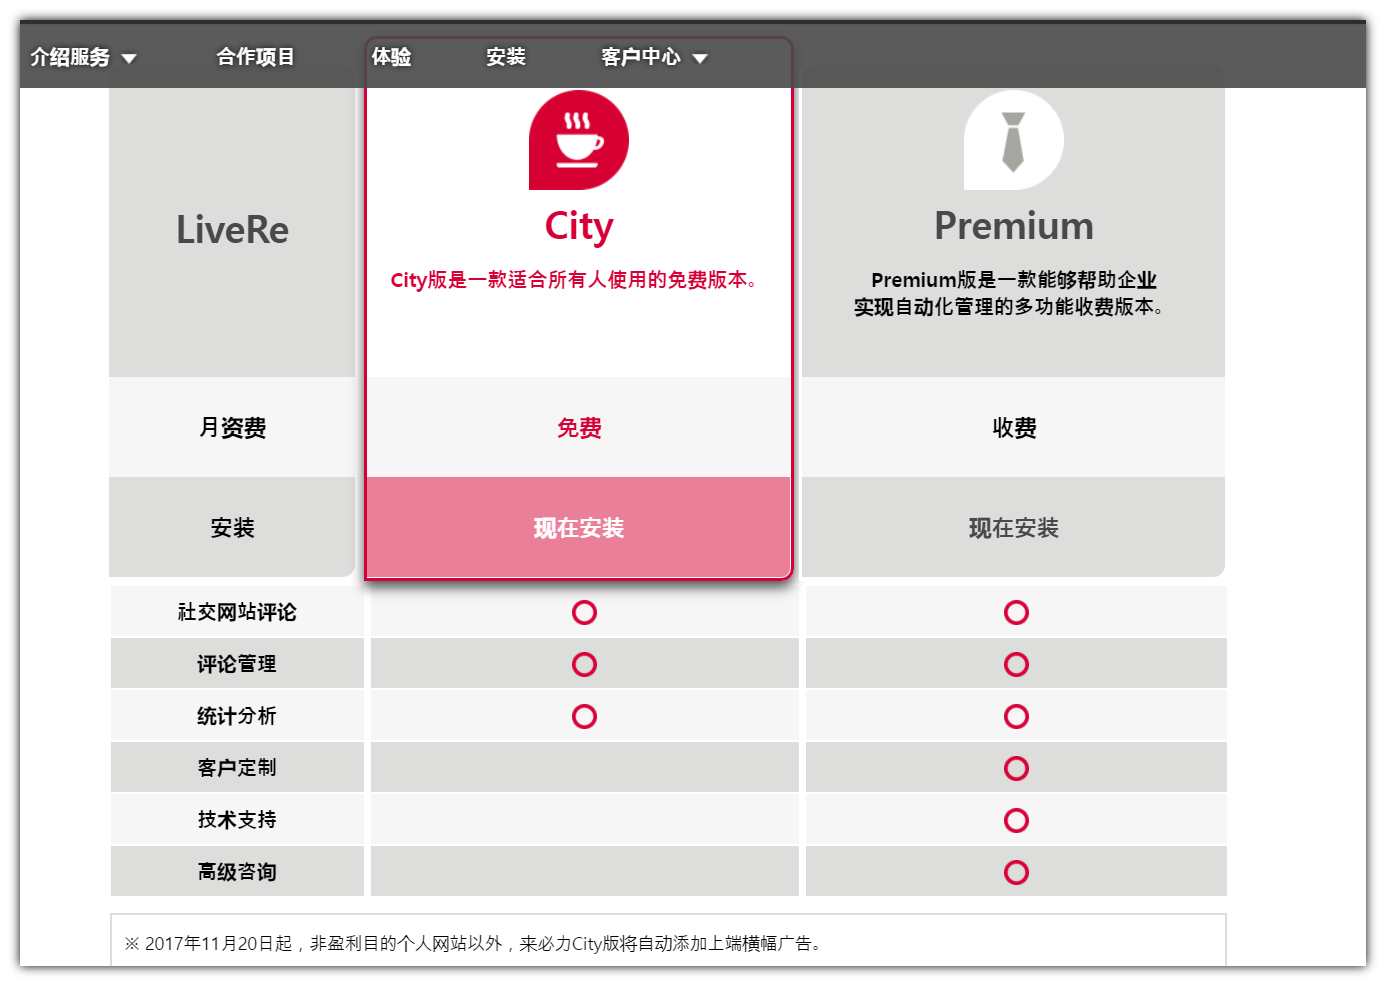
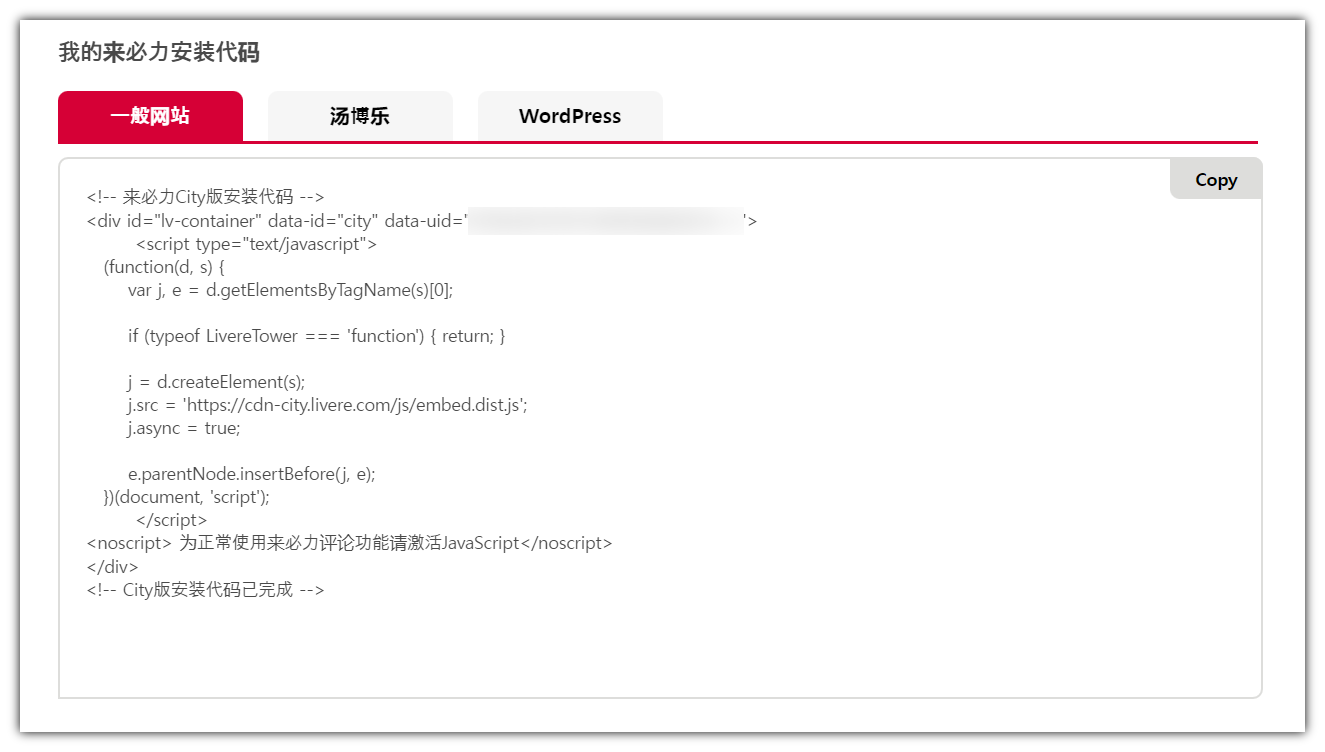
复制其中的data-uid字段。
编辑文件themes/next/_config.yml,启用livere评论系统。如下所示:
1 | comments: |
定位到livere_uid字段,粘贴上刚刚复制的UID。
1 | # LiveRe comments system |
然后就可以看看效果了

不过此时在tags和categories侧边栏也都会有评论,在此类页面想要禁用的只需要在source文件夹下的相应md文件的头部信息中添加comments: false即可。示例代码如下所示:
1 | title: test |
SEO优化
现在网站还没有被搜索引擎收录,搜索引擎是搜索不到的,需要进行SEO优化
生成sitemap文件,需要两种hexo插件,
hexo-generator-sitemap 供谷歌使用;
hexo-generator-baidu-sitemap 供百度使用;
1 | npm install hexo-generator-sitemap --save-dev |
安装完成后,重启hexo,执行hexo g后,在public目录下生成对应的sitemap.xml文件,即已完成站点地图的生成。
本地可以通过下面地址访问到sitemap文件。
1 | http://localhost:4000/sitemap.xml |
确认可以访问到后,部署到网站
谷歌搜索配置
首先你需要一个谷歌账号,然后使用Google Search Console服务,点击立即使用!
选择第二种,填写你的Github Page主页地址后点击继续,记得地址前面的协议https://别忘了
验证所有权
随后你可以看到如下几种方式用以验证你对站点资源的所有权
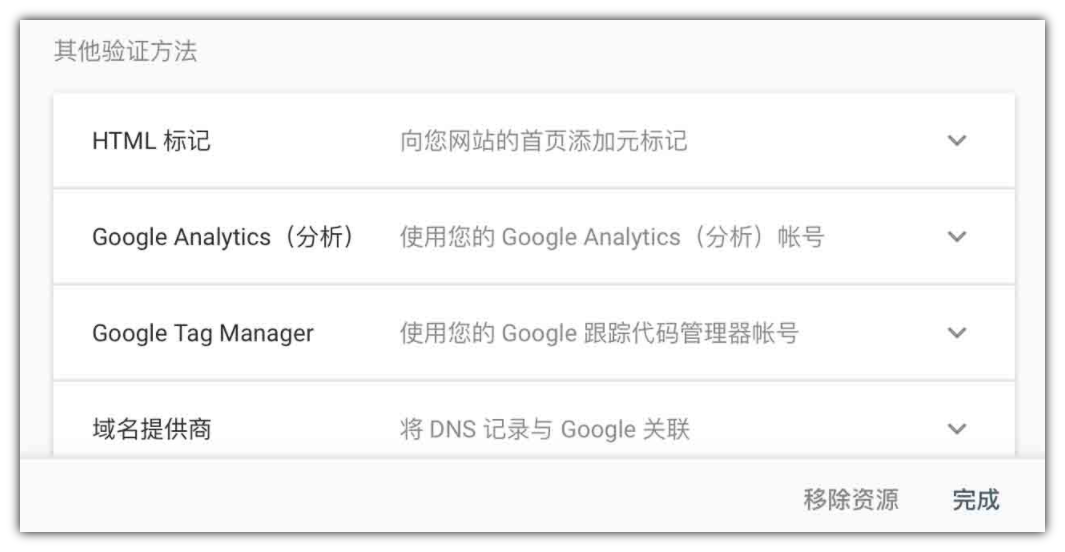
打开主题配置文件(/themes/next/_config.yml),找到如下片段:
1 | # Google Webmaster tools verification. |
在Google Search Console选择HTML标记验证,Google会提供如下的元标记
1 | <meta name="google-site-verification" content="xxxxxx" /> |
将content=后面的xxxxx填到主题配置文件的google_site_verification: 之后,记得冒号后需留一空格,同时不要忘记引号:
1 | # Google Webmaster tools verification. |
保存文件,进行部署,部署成功后,回到Google Search Console,点击验证、完成。
请求编入索引
来到Google Search Console,点击左侧边栏中的网址检查,输入你的Github Page主页。
- 如果显示网址已收录到Google,可以跳过本部分直接看到提交站点地图
- 如果显示网址未收录,点击右下角的请求编入索引,一般来说一到两天后Google就会收录。
提交站点地图
还是Google Search Console,点击左侧边栏中的站点地图,添加新的站点地图,在主站地址后面填入sitemap.xml,即与前面生成的站点地图文件名称相同!
一开始,Google有可能显示无法获取站点地图,我这里报了这样的错误,后来发现是没有在hexo的_config.yml配置文件中正确填写我们的博客网址。
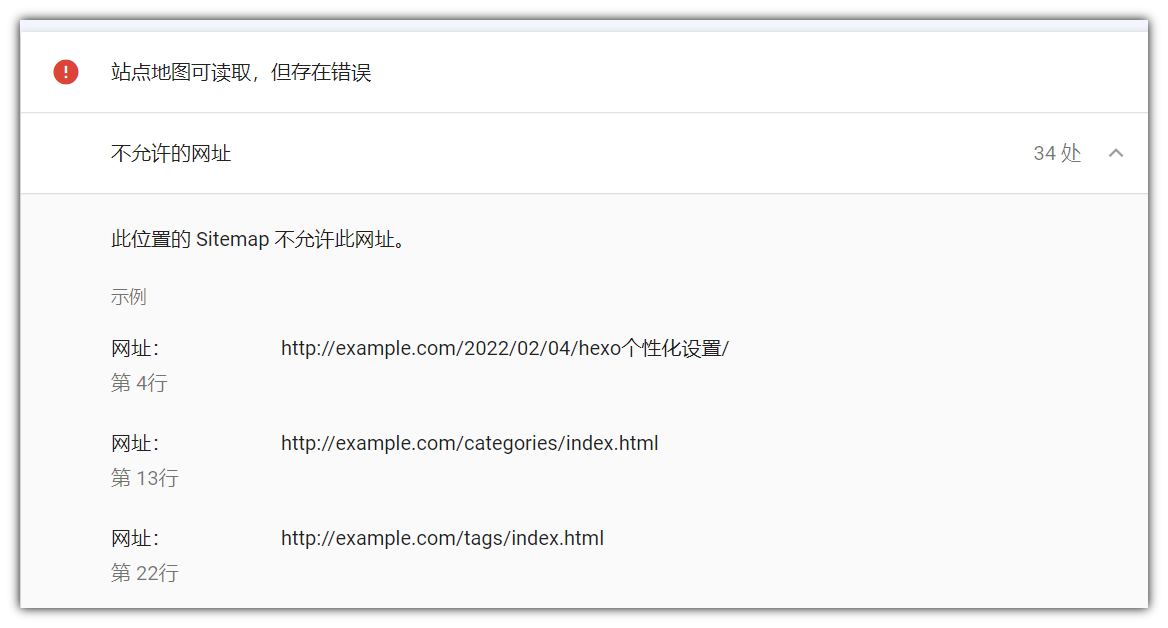
解决办法:
编辑hexo的配置文件_comfig.yml
找到url:这一行
1 | # URL |
将example.com改为你自己的网址,再次部署后,添加站点地图

测试
- 在Google搜索site: username.github.io,可以看到你的博客主页